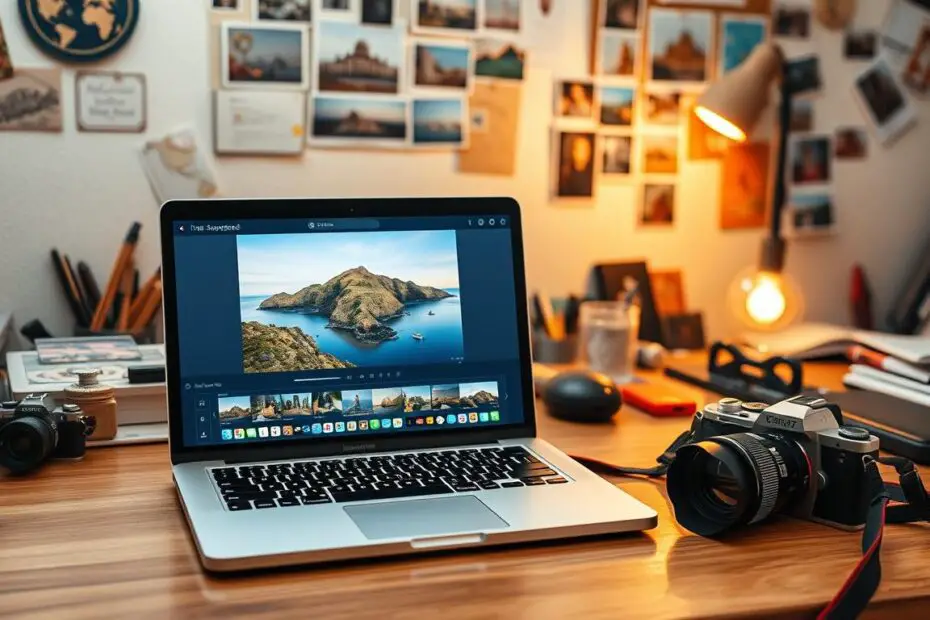
I love photography, but choosing the right gear for travel trips can be tough. I have Adobe Photoshop, but the mobile versions don’t meet my needs. Snapseed, a mobile app, has become my go-to for editing photos on the go.
Snapseed lets me edit RAW files and try out new looks on my phone. It’s perfect for those quiet moments in hotel rooms after a day of sightseeing. I like its simplicity, as it saves me from carrying extra gear or dealing with data transfers. Snapseed meets most of my editing needs, making it my top choice for travel photos.
Key Takeaways
- Snapseed is a powerful mobile photo editing app that allows for RAW file editing and advanced adjustments on the go.
- The app’s user-friendly interface and range of tools make it a preferred choice for travel photographers looking to edit their images during downtime.
- Snapseed’s minimalist approach aligns with the need to travel light, as it eliminates the hassle of transferring data or bringing additional equipment.
- The app covers about 80-90% of the author’s mobile photo editing needs, making it a reliable companion for on-the-move photo editing.
- Snapseed’s accessibility and comprehensive editing features make it a cost-effective solution for travel photographers seeking a mobile editing solution.
Introduction
As a travel photographer, I’ve learned how vital photo editing is. It’s like the darkroom was in film days. Editing your photos is key to bringing your vision to life and finishing your work.
Why Snapseed is a Preferred Choice for Mobile Editing
There are many mobile editing apps out there, but Snapseed stands out to me. Its easy-to-use design and powerful tools make it great for editing on the move. It’s perfect for travel photographers who need to edit quickly and share photos without heavy gear.
“Editing your photos is just as important as how you compose them, allowing you to create the final product.”
Snapseed lets me tweak exposure, contrast, and color, and add cool filters. Its non-destructive editing means I can try out changes without messing up the original photo.
For me, Snapseed is essential for editing photos fast while traveling. It helps me share amazing images that inspire others to see the world.
Transferring Images from Camera to Smartphone
As a photographer who loves to travel light, transferring images from my camera to my smartphone is key. I have a few ways to do this – using a cord or a memory card. But I prefer the simplest method, without extra gear.
For a “packing light, non-photography” holiday, I could skip this step. But for now, I use my compact camera and Snapseed to edit my photos on the go.
Snapseed meets about 80-90% of my photo editing needs while traveling. I transfer images from my camera to my smartphone via Wi-Fi. This lets me edit and share my photos quickly with the Snapseed app.
I’m an Android user and also back up my edited photos with Google Photos. I share them on Flickr too. Snapseed works on both Android and Apple devices, making it easy to edit photos anywhere.
Snapseed’s easy-to-use interface and powerful tools help me make the most of my travel photos. Even with a smartphone, I can get professional-looking results. The app’s non-destructive editing and wide range of styles and filters are perfect for on-the-go editing.
Getting Started with Snapseed
Snapseed is a top choice for mobile photo editing. It’s easy to use and perfect for enhancing travel photos on the go. It works on both Android and Apple devices, thanks to its simple design and wide range of tools.
Snapseed Interface and Layout
The app’s layout puts key editing tools at the top. This makes it easy to find and use them. It’s a favorite for those who love Snapseed, mobile photo editing, and photo editing tools.
Basic Tools and Adjustments
- Cropping and Straightening: Adjust the composition and orientation of your images to create a more visually appealing result.
- Exposure and Contrast: Fine-tune the brightness, shadows, and highlights to ensure your photos have the perfect balance of light and dark elements.
- Color Adjustments: Modify the saturation, temperature, and individual color channels to make your travel photos pop with vibrant hues.
Snapseed makes it easy for photographers to enhance their mobile photos. It helps create stunning, professional-looking travel images.
Cropping and Straightening Photos
Editing travel photos is key, and photo cropping and photo straightening are crucial. These simple steps can greatly improve your photos’ look and feel.
The crop tool in Snapseed lets you adjust your photo’s size and shape. It helps you highlight the main subject and remove distractions. Cropping can make your travel photos more engaging and impactful.
It’s also vital to straighten the horizon line. A tilted image can look unbalanced. Snapseed’s straightening tool makes it easy to fix this, ensuring your photos look sharp and professional.
| Editing Technique | Benefits |
|---|---|
| Photo Cropping | – Reframes the composition – Removes distracting elements – Emphasizes the main subject |
| Photo Straightening | – Ensures a level and balanced image – Enhances the visual appeal – Gives a professional, polished look |
Learning these basic travel photo editing skills in Snapseed can take your photos to the next level. You’ll be able to share stunning images that truly capture your travel experiences.
Adjusting Exposure and Contrast
Capturing the perfect travel photo is not just about the initial shot. It often requires thoughtful post-processing to bring out the best in the image. Adjusting the exposure and contrast is a critical step in editing travel photos. By carefully manipulating these elements, you can enhance the overall impact of your images.
Apps like Snapseed and Lightroom provide powerful tools for adjusting shadows and highlights. These tools allow you to precisely adjust these areas, bringing out more details. This creates a more balanced and visually striking image.
For example, if you’ve captured a stunning landscape with a bright sky and dark foreground, you can use the Selective Adjustment tool in Snapseed. This tool lets you selectively brighten the shadows in the foreground while maintaining the highlights in the sky. This technique ensures that all important details in your travel photo are visible and well-exposed.
By carefully manipulating the exposure and contrast, you can enhance the overall impact of your travel photos. This simple yet effective editing technique can make a significant difference in the quality and visual appeal of your travel photography.
Color Adjustments
Mastering color adjustments can change the game for travel photographers. Snapseed, a top mobile photo editing app, has tools for tweaking color saturation and color vibrancy in your travel photos.
Adjusting Saturation and Vibrancy
Snapseed’s sliders let you tweak the color saturation and color vibrancy of your photos. Boosting saturation makes colors stand out, adding vibrancy. Adjusting vibrancy brings out the fine details in your photos without overdoing it.
Playing with these color tweaks can really show off your travel stories. Snapseed helps you get the look you want, from bold and bright to soft and cinematic.
Selective Color Editing
Snapseed also lets you edit specific colors in your photos. This selective color editing feature lets you focus on certain hues. It gives you more control over your photos’ final look.
With Snapseed’s color tools, you can make your travel photos pop. Whether you want to brighten a sunset, soften colors, or highlight certain parts, Snapseed’s got you covered.

How to Edit Travel Photos Using Snapseed?
Snapseed is a top choice for editing travel photos on the go. It has a wide range of tools and is easy to use. This makes it great for quick and effective edits.
Here’s how I edit travel photos with Snapseed:
- Transferring Images: First, I move the photos from my camera or memory card to my phone. This makes sure I have all the shots ready for editing.
- Cropping and Straightening: Then, I crop the images to the right size and straighten any tilted parts.
- Exposure and Contrast Adjustments: Next, I work on the exposure and contrast. I bring back details in shadows and highlights.
- Color Adjustments: After that, I adjust the colors to make the photos pop. I aim to capture the true essence of the place.
- Selective Edits: Snapseed’s tools let me make specific changes. For example, I can brighten a subject or tone down a background.
- Applying Filters and Presets: I then use Snapseed’s filters and presets to add a unique touch. This helps achieve the mood and style I want.
- Sharpening and Noise Reduction: Last, I sharpen and reduce noise. This makes the photos clear and ready to share.
Snapseed is great for editing travel photos because it offers professional results fast. Its tools are easy to use, so I can enhance my photos quickly. This way, I can share amazing images with loved ones.
| Snapseed Features | Benefits |
|---|---|
| Comprehensive Editing Tools | Allows for precise adjustments and fine-tuning of exposure, color, and details |
| Selective Editing Capabilities | Enables targeted edits to specific areas of the image |
| Diverse Filter and Preset Options | Provides creative flexibility and unique artistic touches |
| Efficient Workflow | Streamlines the editing process for quick and effective results |
The Snapseed tutorial by Photo Genius on YouTube is a great resource. It teaches you how to use the app’s features and techniques. This helps photographers of all levels improve their mobile photo editing skills.
“Snapseed is the number one photography tool for editing images quickly on the go.” – Instructor Paul Ferris
Whether you’re a seasoned traveler or new to exploring, Snapseed is a powerful tool. It helps you turn your travel photos into stunning works of art. With its easy-to-use interface and wide range of editing tools, you can enhance your travel photo editing workflow and capture the essence of your adventures.
Applying Filters and Presets
Snapseed has many filters and presets to enhance your travel photos. I like to edit photos myself, but Snapseed’s “Looks” feature is great for quick fixes. It’s a good starting point for making your photos pop.
Trying out different filters and presets can help you achieve the look you want. This way, you can make your travel photos stand out. It’s perfect for social media or personal projects.
Snapseed has been a top choice for photographers for over 10 years. It’s free and has advanced editing tools, including Raw editing. It’s available for both Android and iOS, making it easy to use.
However, Snapseed saves edited photos next to the originals. This can make your storage space messy. Still, its features and ease of use make it a favorite for many.
Other apps like Adobe Photoshop Express, VSCO, and Adobe Lightroom Mobile also have their strengths. Adobe Photoshop Express is great for beginners, with easy tools and filters. VSCO offers beautiful film-like presets and simple editing tools. Adobe Lightroom Mobile is for serious photographers, with advanced features like selective adjustments and RAW file handling.
Choosing the right photo editing app depends on your needs and style. Knowing what each app offers helps you pick the best one for your travel photos.
Sharpening and Noise Reduction
At the end of my Snapseed editing process, I focus on sharpening and noise reduction. Sharpening makes my travel photos look more detailed and clear. Noise reduction is key for low-light or high-ISO shots, reducing grain and digital artifacts.
Snapseed makes it easy to adjust sharpening and noise reduction. This helps me make my travel photos look polished and ready to share. Using these tools, I can improve the quality and impact of my photos, even in tough shooting conditions.
Sharpening for Crisp Details
The Sharpening tool in Snapseed is a big help for making my travel photos clearer. I can tweak the sharpening, radius, and threshold to enhance details without adding halos. This is great for capturing textures, landscapes, and cultural patterns.
Reducing Noise for Cleaner Shots
In low-light or high-ISO shots, Snapseed’s Noise Reduction tool is crucial. Adjusting intensity and smoothing helps reduce digital noise while keeping the photo’s natural look. This keeps my photos clean and true to the scene, even in tough light.
| Feature | Description |
|---|---|
| Photo Sharpening | Enhances the clarity and definition of details in travel photos |
| Noise Reduction | Minimizes the appearance of digital grain and artifacts in low-light or high-ISO images |
Learning to use sharpening and noise reduction in Snapseed makes my travel photos stand out. These techniques are key to showcasing the beauty of the places I visit.

Saving and Sharing Edited Photos
After editing your travel photos with Snapseed, it’s time to save and share them. Snapseed makes it easy to export your images to Instagram, Facebook, and Twitter. This way, you can share your edited photos with the world.
Exporting to Social Media Platforms
Snapseed connects with top social media sites. This lets travel photographers share their edited photos fast. It’s a great way to engage with your audience and share your travel stories.
Backing Up to Cloud Storage
Snapseed also backs up your photos to cloud storage. This keeps your travel memories safe from loss. You can upload your photos to Google Drive, Dropbox, or iCloud with just a few taps.
Snapseed makes it easy to save and share your photos. It helps travel photographers show off their work and keep their photos safe. Whether you’re posting on social media or backing up your photos, Snapseed makes it simple.
Tips and Tricks for Advanced Editing
Snapseed is a top-notch mobile photo editing app. It has advanced tips and tricks for travel photographers. These can take your editing skills to new heights. You’ll be able to make your travel photos stand out and wow your audience.
Create Custom Presets
One key feature in Snapseed is creating custom presets, or “looks.” This lets you save your favorite edits and use them on many photos. You can mix filters, exposure, and colors to create a unique style that shows off your personal taste.
Leverage Selective Editing
Snapseed’s selective editing tools are a big deal for fine-tuning your photos. Use the Selective tool to tweak specific parts of your image. This lets you highlight the best parts of your travel scenes and make your photos look pro.
Harness the Power of Layers
Even though Snapseed doesn’t have layers like desktop software, it has a Duplicate feature. This lets you work on different versions of an image. It’s great for trying out various edits or complex changes without messing up the original.
Learning these advanced Snapseed tips for travel photo editing opens up new possibilities. With practice and creativity, you can turn your travel photos into stunning, professional images.
“The best camera is the one you have with you, and with Snapseed, you can turn your smartphone into a powerful photo editing tool.”
Conclusion
Reflecting on my mobile photo editing journey, Snapseed is now key in my travel photography. It’s simple, functional, and packed with editing tools. This makes it perfect for editing photos on the move. With Snapseed, I can quickly edit and share my travel photos, keeping the essence of my adventures alive.
In this guide, I’ve shown how Snapseed’s features can enhance your mobile travel photography. From basic tweaks to advanced edits, Snapseed’s tools help me improve my photos. Its user-friendly design and powerful features have taken my mobile travel photography to new levels.
As I keep exploring, Snapseed will stay a reliable partner. It helps me create stunning and genuine travel photos that truly show the places I visit. Using mobile photo editing with Snapseed, I can keep my travel memories vivid and detailed, just like with professional software.
I was very pleased to find this web-site.I wanted to thanks for your time for this wonderful read!! I definitely enjoying every little bit of it and I have you bookmarked to check out new stuff you blog post.
Comment awaiting moderation.